
Having contributed artwork to Osprey for the best part of twenty years it seemed appropriate, when asked by Osprey, that I might contribute a little insight to some of my creative processes throughout that time.
To begin with, it seems relevant to start with some of the work I do outside of my Osprey illustrative work. For my professional career I've been a long time Art Director at VFX house, Axis Studios. While there I've learned the importance of selling a theme by using dramatic compositions, meeting tight deadlines and getting to grips with creating artwork through the digital medium.
Alongside my day job I also craved a return to the more traditional methods of oil painting, something I hadn't dabbled in since a very young man. To this end I started painting aviation artwork using oils on canvas over fifteen years ago.
Both of these creative outlets have fed directly into my Osprey work, with a mix of traditional and modern methods allowing me to develop a look that feels traditional, but has a bit of cinematic drama to it.
Below you will find examples of both my digital Axis work, alongside my oil painted work.
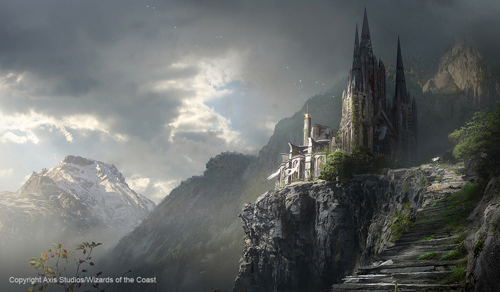
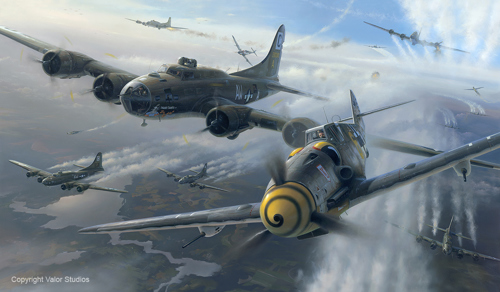
For Osprey my artwork is all digital, it allows me to work quickly, and if there is any need for dramatic changes to the art, it's relatively easy to cater for this through Adobe Photoshop, which is the 2d program I use for finalsing the images.
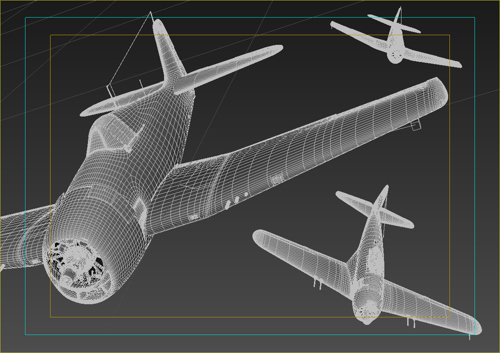
Before that though I use a program called 3d Studio Max to virtually build the models of aircraft that I'll feature in my Osprey commissions. This is a process in itself and takes considerable research and time to create the model. I use lots of reference books and online walkaround features to make the model as accurate as possible to the real thing. It's not dissimilar to making models in plastic, but there is no instructions, so outside using blueprints, the process is all from scratch.
Below is an example of a 3d model at the very start of the build, and what it ends up looking like after many months of work.
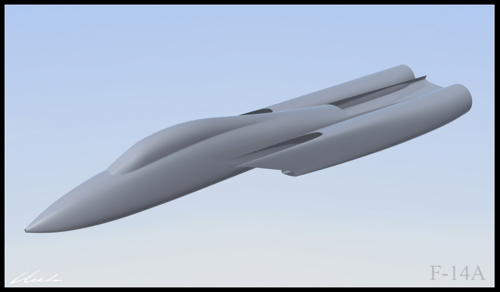
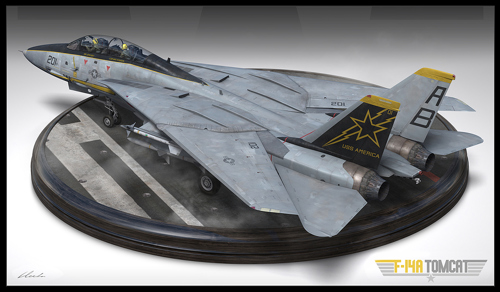
When the commission comes in I will receive a written brief from the author, alongside reference images of the subject aircraft, location maps and anything else that may be of help.
I'm constantly grateful to the authors, as more often than not the brief and references are incredibly helpful and make my job much easier.
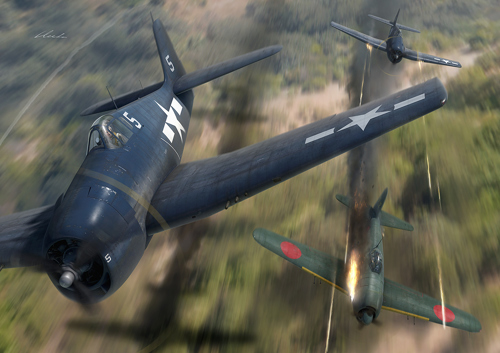
As an example I'm going to briefly give a run down of the approach I took to the centre spread artwork for the 'Dogfight' title covering the Hellcat during the Philippines campaign 1944: DOG 5 F6F Hellcat: Philippines 1944
With the brief received, I knew my artwork needed to feature two Hellcats shooting down a Japanese N1K1-J Shiden at low level over the jungle. Using 3d Studio Max I take my models of the Hellcats, Shiden, and create a virtual camera to look at them through. From there I can position them into a dynamic composition, while also moving the camera around to amplify the drama.
For centre spreads, like this one, I have to be very mindful of the page gutter that runs down the centre of the book, a portion of the image will be obscured by this, so I need to position my subjects into areas where we're not losing important visual information, cockpits, engines, key markings, that kind of thing.
I'll do this to the point where everything feels like it's all working harmoniously together.
Although there is no lighting or details in the scene, I can then take the camera view and render it to a JPEG image. This stage is to provide the editor and author with a rough idea of what the overall composition would look like. Typically I'll also add a very basic background in Photoshop to give them a little further context for how the subject aircraft will look within the location.
Below is the rough concept for the Hellcat title.
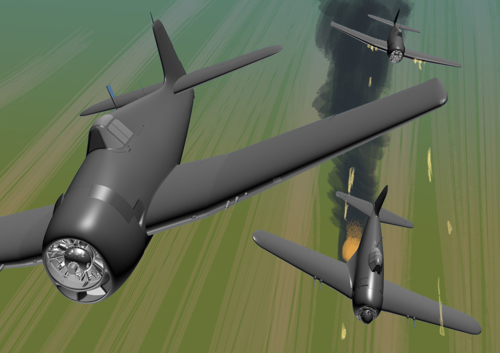
If there is no feedback I can then move onto creating the finished art. The first part of this is adding a light source within my scene in 3d, like the camera, I can move this around to a place where I'm happy with it. A lot of times I will try to position it to a point where I can get a nice sense of sunlight glinting off the fuselage and canopy, this helps give the aircraft a sense of shape.
When I've got the lighting working I'll then render the aircraft against a blank background, I can then take this image into Photoshop and isolate the aircraft into their own layer and experiment with different backgrounds to get the look I want. I have a huge photo library that I can browse through, but I nearly always find myself chopping up different images and putting them together into something that works for the subject matter. The trick is to do it in a way where everything feels holistic.
An additional benefit working with Photoshop is that you can add features like motion blur. So you can see here, because the aircraft are travelling over the jungle at low level I've motion blurred the background to give an extra sense of speed.
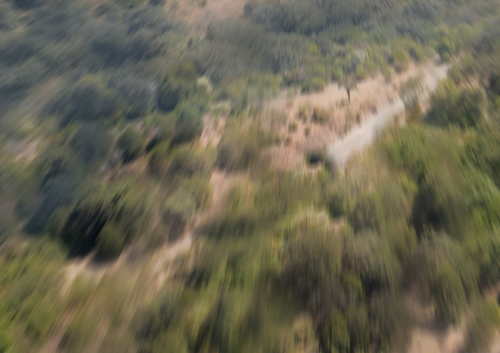
With the background done I can now go back into my 3d program, and render everything together in a higher resolution. Although it all feels like it's working together, it still needs all the elements to be integrated better, for this I will take it back into Photoshop.
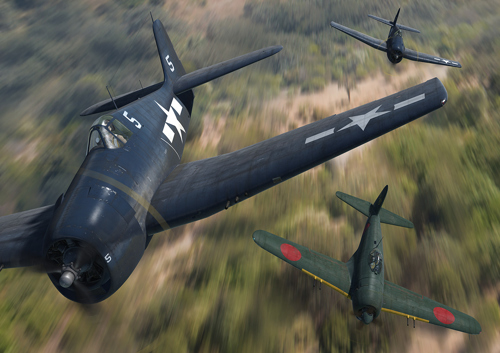
One of the interesting parts of working with Osprey is sometimes you are handed unexpected challenges. In this case the issue was with the N1K1-J. I only had a 3d model of the later version, the N1K2-J Shiden Kai. Superficially they are pretty similar, but on closer scrutiny the earlier version still retained the higher wing position from the 'Rex' float plane, alongside other important differences.
If the Shiden had been the main focal point I would probably have made those changes to the 3d model, but as it was in the background I decided it would be quicker and easier to use Photoshop to reposition, and repaint key elements.
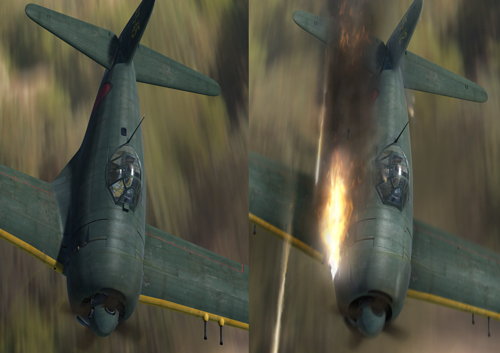
Other Photoshop additions included a more detailed overpaint of the Hellcat pilot, tracers, wing contrails, smoke and fire to the Japanese aircraft, and some motion blur to selected areas of the aircraft.
The rest of the process is making small adjustments to help blend the 3d aircraft better against their 2d background, I typically adjust contrast levels, saturation of colours, create some light wrap around the aircraft, and other tricks to get the image to the point that I'm happy with. All that remains is the author and editors approval and it's all done!
Below is the finished artwork.
Thank you for taking the time to read through.
Find out more about Gareth and is work on his website www.garethhector.co.uk


Comments
You must be logged in to comment on this post. Click here to log in.
Submit your comment